
10:20 AM

By
Unknown
 #pillarpod
,
AEM,
AirBagIt,
American Force Wheels,
Automatic Cargo Light,
BedSlide,
Bushwacker,
MSA,
Nitto,
PowerBass,
Ram Mount,
Rigid Industries,
Roadwire,
SEMA,
SEMA 2013

The rear pods were built very much like the first. Except there was once step change. Here's what we did.
Step 1: Trimmed and created a wooden structure what would work within the door panels. We trimmed the door panels as well, where necessary.
Step 2: Created a base for the structure using wood this time rather than fiberglass. The reason for this is that it's quicker because the wood didn't have to dry like resin does. Also, it was a flat surface and had no contours.
 Step 3: W reassembled the door panel and taped it with aluminum tape. The floor, the sides, and everywhere we wanted to see the pod's form. We then placed the wooden frame in its location.
Step 4: Here's what we tried....Great Stuff. We got a few cans of "Great Stuff" at Home Depot and spray it in the structure. We did this to make sure we had an exact replica of the interior of the pocket.
Step 5: Once dried, we trimmed and shaped the foam to how we wanted. This can be done with 36 grit sandpaper and a sharp knife.
 Step 6: Once shaped, we used 3M Super trim adhesive again. Instead of staples, we used the adhesive to keep the fleece in place. This allowed me to move the fleece where I wanted it and keep it in place, just as staples would. But it also kept the fleece to the foam, whereas, staples would have shot right though.
Step 7: Resin and allow to cure. From here on out, it's just the same as the fronts. Trim off excess fleece and do body work.
Step 8: Prime and paint. Reassemble Doors.
Read more
3:04 PM
By
Unknown
AEM,
AirBagIt,
American Force Wheels,
Automatic Cargo Light,
BedSlide,
Bushwacker,
HornBlasters,
MSA,
Nitto,
Ram Mount,
Rigid Industries,
SEMA,
SEMA 2013,
SEMA show
 As I mentioned before, the main challenge here is clearing the dash when the door closes. We measured this area several times and marked the doors where it would be safe. We then began building the wooden structure. To make this a little more challenging, we wanted to see the door panels almost effortlessly move into the speaker pods. We trimmed the panels so that the pods for the front doors would slide right under the panel. We then built the wooden structure and made sure all components cleared the doors. Success! Then comes the build. Here's what we did step by step.
 Step 1. I used strand fiberglass to create a base. I wanted something that was form fitting and sturdy enough for the wooden structure to stick to. We used aluminum tape and pressed in all the grooves, corners, and made it contour to the exact shape of the door.
Step 2: Wax wax wax. Resin doesn't like to stick to waxy surfaces, so this allows us to pull the fiberglass away from the door when the mold is complete.
Step 3: 3M Super trim adhesive. One of the most difficult things to do in this process is making sure the fiberglass itself works through the grooves and the shapes its supposed to, giving it the strength. We actually use the glue to do this and press the fiberglass where we need it.
 Step 4: Resin. Cover the fiberglass strands in as must resin as possible. Enough to create a level surface we can adhere the wooden structure to.
Step 5: Let dry.
Step 6: Once its dried, we were able to pull the fiberglass straight off the doors for a perfect bottom structure for the pods. The fiberglass is sturdy enough now, I used a nail gun and through the bottom of the fiberglass, shot nails into the wood, holding it in place.
Step 7: Then comes the fleece. Using staples, we wrapped the wooden structure using fleece, keeping it as tight as possible and forming the generic shape we wanted. For novices, fleece is used to absorb resin. It offers some rigidity once absorbed, very much like fiberglass does, so It's popular to use when making "
"fiberglass" enclosures. When sanding, you don't get all the fiberglass debris in your arms and so it's nicer on the skin as well when sanding.
Step 8: Resin and let dry.
Step 9: Once dried, we cut away any excess fleece and using a roloc disc, shave down any mistakes in forming the fleece. Sometimes it doesn't stretch exactly where you need it and spots become wrinkled. That's not an issue.
Step 10: Once done, we take short strand fiberglass filler and fill in any necessary areas. We also use it to get both structures to match up better.
Step 11: More fiberglass short strand and bondo. Layer, sand, and shape. Repeat, repeat, and repeat until the process is done. Between a few of these steps, you may use primer to get an idea. It can be sometimes difficult to see if the shapes are matching having multiple colors, so a can of Duplicolor Gray Primer works great.
Step 12: Use higher grit sandpaper and continue to shape. Your end point will be determined what you're doing. We are spraying flat black and texturizer, so for our application, it doesn't have to be perfect. However, if you are doing a gloss paint like on the exterior of a car, you have to continue until all the waves and imperfections are gone.
Step 13: :Paint, cut out the holes for the speakers, mount it to the panels. What's left is up to your audio expert. :D
Read more
2:01 AM
By
Unknown
AEM,
AirBagIt,
AirBagIt.com,
American Force Wheels,
Automatic Cargo Light,
BedSlide,
Bushwacker,
HornBlasters,
MSA,
msauthority,
Nitto,
Ram Mount,
Rigid Industries,
Roadwire,
SEMA,
SEMA 2013,
SEMA show
The speaker pods have been an amazing feat from the get go. I'll explain how speaker pods are normally made and a new method I tried out that worked great for me. First off, we didn't want to build something simple. Sponsors don't want that. They want their products displayed, not hidden. They want flashy, showy, attention drawing exposure. I'll write a blog later on sponsors - how to get them, what they expect, and the understanding of what comes with that.
Front Doors:
So, we had a small challenge to overcome here. We definitely wanted to incorporate as much sound awesome-ness as possible. We chose a set of 3 way components for each door. However, Fords are known for not having a lot speaker space. Some nice deep pockets are available, but everyone does the same...mold the speakers using the whole door panel and rock on. Just perhaps the speakers in different spots, but most are about the same. Nah. I wanted technical credit. Not SQ, but "cool" credit. So, I chose to keep as MUCH of all the pockets as possible. After all, we are still using this truck daily. We chose to put the speaker pods in front of the pockets. However, we were faced with the challenge that when the doors closed, the dash would hit. So we had to be careful where exactly we put the speakers. I wanted them to look like they were a part or at least a continuation of the factory piece.
Rear Doors:
These doors are a bit more challenging. First, the speakers sit behind the back seats and to the side. If you've owned a Ford truck, this design hasn't changed in years. Because of Ford's design, there are no speaker wires going into the back doors, nor is there any room. There were 2 additional factors that came into effect here. One, we are doing Suicide doors. We had to make sure where ever we put them, the doors still worked. Second, I have little kids, and those speakers had to be protected. So the only spot I was left with was inside one of the door pockets. I decided then to replace the front door pocket with the speakers with pods that were isolated. Basically, instead of molding the speakers into the door panels, like most do, but trimming the panel to meet up with the speaker pods. Technical...I think so. Trimming a plastic door panel very closely is not an easy task.
to be continued...
Read more
1:54 PM
By
Unknown
AEM,
AirBagIt,
American Force Wheels,
Automatic Cargo Light,
BedSlide,
Bushwacker,
HornBlasters,
MSA,
msauthority,
Nitto,
Ram Mount,
Rigid Industries,
Roadwire,
SEMA,
SEMA 2013,
SEMA show
Recap: We ordered and received a lot of wrong parts. Not at the fault of the sponsor, but somewhere there were some miscommunication. The rear setup allowed us to go low. Body drop low, which is great, but with us having BedRug and Bedslide as sponsors, we didn't want to notch and cut the bed. So that was a no go. The front suspension, being a 4WD, proved to be a difficult task, and after lots of cutting and trimming, we got the truck's transfer case to sit inches from the oil pan. No problem, except the bracket setup for the front is for a 2WD, and the setup with bags didn't even fill the gap at the trucks lowest position. There in lied our issue.
So, here we are 2 weeks before D-Day and our correct parts arrive (10/17/13). So we have to fabricate and create a complete airbag suspension set up. That wouldn't be a big deal, but....there's just such a long list of things to do that it set us up for long days ahead. In addition, our wheels hadn't arrived. The wheels are brand new for 2014 release, so they were being made specifically for our vehicle. That's a whole 'nother story. :D
So over the next few days, we fitted, measured, tacked, cut, fitted, measured, and made everything where we wanted. It looks great. The parallel bars were in place. The compressor/valve housing had been made the week prior. Many endless nights of cutting, welding, grinding, buying and finding scrap metal... A Spcial thanks to our friends at Conway Precision Products. Because of them, we were able to get a LOT of our metal. We were rocking and rolling, and....then wheels finally arrive on 10.21.13. Uh oh...
to be continued...
Read more
9:00 AM
By
Unknown
AEM,
AirBagIt.com,
American Force Wheels,
Automatic Cargo Light,
BedSlide,
Bushwacker,
HornBlasters,
MSA,
msauthority,
Nitto,
Ram Mount,
Rigid Industries,
Roadwire,
SEMA,
SEMA 2013,
SEMA show,
Suspension Lift
Finally...all our airbag components have finally arrived. Opening these packages were a relief. The schedule is extremely tight, and we will use every second to complete the project. We hoped that the airbags would have arrived a week or two ago. But with the setbacks on the suicide doors, it wasn't a problem to receive them a little later. The brackets and all the components looked great. When we finally received the setup, we noticed the back bag brackets weren't correct. Another kink in the chain. Somehow there was some miscommunication, and we ordered the incorrect parts.
The rear brackets were made with the bags on the outside of the frame, therefore placing them closer to the wheels. Not having received wheels yet, we weren't entirely sure this would clear the setup. Especially since the vehicle will be sporting 24" wheels. The front brackets were too short and are the setup for 2wd vehicles and not our 4wd.
Grant it, we are able to fabricate our own parts and create a system completely outlandish. But time wouldn't allow it. Being a 2014, we were only able to take delivery of the vehicle a month ago. Purchasing parts that were fabbed for the truck was our quickest route.
So the challenge we face is this. We cannot cut a hole in the bed, nor can we raise the floor. BedSlide and BedRug are both listed as sponsors. Both products must be in the vehicle, and although we are building a custom truck, we want to retain as much of the product's originality as possible. Then again, this is a 4wd vehicle that has to go LOW. So the logistics of such as build has been challenging. We, however, have made forward progress. The front has been cut, trimmed, and shaved to get it at its lowest point. When the airbags are fully deflated, the oil pan will sit just a hair above the transfer case. We have maxed the limits.
No kink that can't be handled. Just another part of the SEMA woes... It happens. Continue to rock on.
Read more
8:53 PM
By
Unknown
AEM,
AirBagIt.com,
American Force Wheels,
Automatic Cargo Light,
BedSlide,
Bushwacker,
HornBlasters,
MSA,
msauthority,
Nitto,
Ram Mount,
Rigid Industries,
Roadwire,
SEMA,
SEMA 2013,
SEMA show
 Finally! After doing and redoing, we have a working and functioning Passenger rear door. The body lines are perfect. The door doesn't have any play in it anymore, and it opens and closes just as smooth as it used to, but in reverse fashion. So stoked...other side shouldn't give us any problems.
Read more
10:00 AM
By
Unknown
AEM,
AirBagIt.com,
American Force Wheels,
Automatic Cargo Light,
BedSlide,
Bushwacker,
HornBlasters,
MSA,
msauthority,
Nitto,
Ram Mount,
Rigid Industries,
Roadwire,
SEMA,
SEMA 2013,
SEMA show
 Well...nothing ever seems to go smoothly when you're talking about a completely custom setup. The Suicide Doors have been redone a few times now to make sure it's form and function is exact. The doors open like they should, they hold like they should, and that they will withstand the abuse of daily use. After installing them, we found the metal in the pocket it wasn't thick and sturdy enough, allowing the door to have some play. The skin we replaced on the doors were too far out, not allowing the hinge bolts to sit flush against the door. So what do you do?... Cut it out and start over with stronger materials and create new template for the other side. Being a newer product we haven't used before, it's always trial and error.
The spacers that were sent with the kit are useful...if perhaps you had a really light door. The spacers allowed for some flex, so we had to recreate a pocket that eliminated the spacers. Compound angles. Fitment and testing. All requires time and patience. But in the end, it's always worth it.
Read more


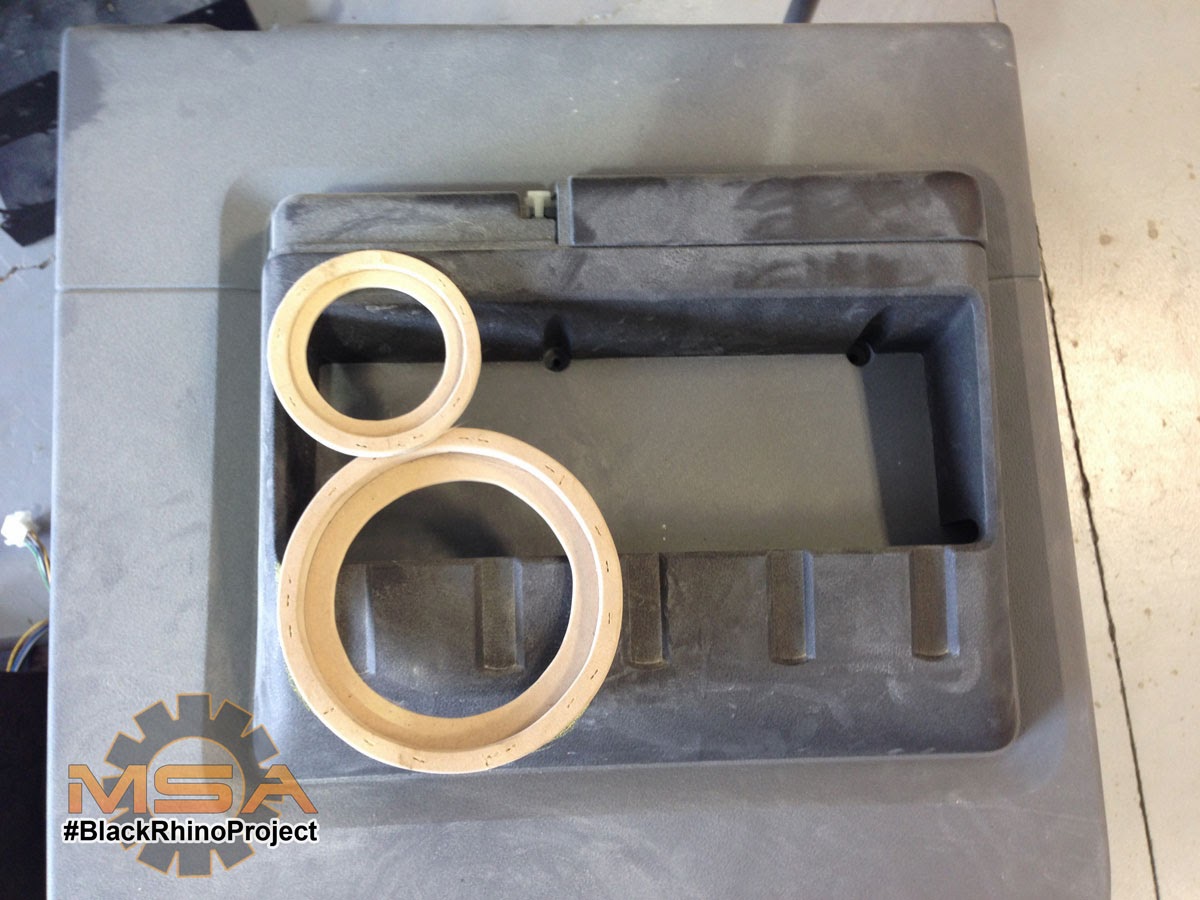

 Step 3: W reassembled the door panel and taped it with aluminum tape. The floor, the sides, and everywhere we wanted to see the pod's form. We then placed the wooden frame in its location.
  Step 6: Once shaped, we used 3M Super trim adhesive again. Instead of staples, we used the adhesive to keep the fleece in place. This allowed me to move the fleece where I wanted it and keep it in place, just as staples would. But it also kept the fleece to the foam, whereas, staples would have shot right though.


