Showing posts with label SEMA. Show all posts

SEMA 2015: 2015 Ford F150 - Brutus > Fab Fours Vengeance Series Bumpers

Fab Fours Vengeance Bumpers


So many bumper manufacturers and designs have started to pop up.  The difficulty sometimes is working out a partnership agreement on products that flows with the other products on the build.  We try bring all the parts together so that the overall build represents everyone well.  

Fab Fours released their Vengeance Series bumpers not long after our initial renderings.  We really liked this bumper.  It wasn't bulky.  It didn't stick way out.  Yet it still provided the aggressive and rugged look we sought after.  A phone call was made and as they say, the rest is history.

We asked that the bumpers be sent raw.  We wanted all our powdercoat textures to be consistent. Even in raw, these bumpers looked amazing.

Fab Fours Vengeance Bumpers

Fab Fours Vengeance Bumpers

Fab Fours Vengeance Bumpers

Fab Fours Vengeance Bumpers

Read more

SEMA 2015: BedRug's 2015 F150 XLT - Grille

For starters, we've installed several overlay grilles, replacement grilles, and cutout grilles.  By the looks of it, it appears this is a cutout.  That's not the case.  The grill was real easy to install.

The 2015 Grilles are a 2 piece construction.  The grille that is visible is actually an outer shell.  The inner component has fins and motor, and is what physically attaches to the truck.  The grill attaches to this piece.

To install, remove all the plastic push tabs from the cover.  Near the latch release, you'll see 2 plugs. Undo those and using a panel popper, pull up the push pin that holds the wires/plugs onto the top.   There you'll remove the 4 bolts that hold the top of the grille in.  There will also be 2 bolts on each side about 3/4 down.  Since we already had the headlights out, this was super easy.  I'm not sure if you'll need to have the headlights removed to gain access to these bolts.  If you do, you'll spend more time removing and reinstalling, then you will actually swapping the grilles out.

Once removed, look at the inside of the grille.  You'll find all the nuts that need to be removed to detach the grille from the assembly.  When done, just reverse the process.  I'm sorry we didn't take pics during this process, but T-Rex does provide a nice instruction booklet to go with it.


Read more

SEMA 2015: Project Brutus *update*


Parts are arriving. As we gather them together, we get ready to schedule one of our biggest builds of the year. After some phone calls, we have almost secured the components necessary to complete this build properly.

American Force Wheels is again our primary sponsor. Always an honor to work with reputable companies. Even better is getting the opportunity to repeat that working relationship. American Force is working on a special project that will debut this year on Project Brutus. 

BedRug and Retrax have returned as sponsors as well. Both great companies with an true no hassle lifetime warranty. We wouldn't want to work with anyone else, so we are happy to have them aboard again. This year, Retrax sent us their newly released MX (Matte) cover, which is amazing.  

BedSlide is another company that has repeated their sponsorship with us. Their products are for SURE a lifesaver for anyone that works out of their truck.

Bushwacker was a no brainer. What better way to accent some 24's with a pocket style fender flare. 


Magnaflow provided us with a dual tip catback exhaust. We can't wait to hear the sound of the itty bitty EcoBoost turbo, spooling.  

Fab Fours sent us their new Venegence Series bumpers to really beef up the truck. They arrived raw for us to Powdercoat gloss black (at our request) and the craftsmanship was amazing.

Roadwire returns to provide us with a leather kit. This one is going to be a surprise which we are really excited about.  We will remove the seats to send off to them for replication. They will return with a new, custom setup. 

Ride Controller is a new company on board this year. This product is amazing. With Bluetooth sync capabilities of up to 150ft, I can turn on and off just about any 12v switched source with a phone!

Extreme Dimensions brings us the hood to give it a more aggressive and tough feel. The hood will also be unveiled at SEMA. 

Sony Car Audio is going to provide the audio system to finish out the interior.

Amp Research is also a new addition, utilizing their XL setup that offers a 3" drop on their steps.  We are super excited about this.  

Last but not least, Bulletproof Suspension, Icon Vehicle Dynamics, and Atlas Suspension finish out the look with a 12" lift. Components will be powdercoated red with a marbled hydrodip to represent Greek pillars. 
Read more

Black Rhino still alive....


Finally!  After a couple of years, Black Rhino Project has been officially published in the July edition of Diesel World Magazine.  Shared throughout social media, online magazines, and other outlets, we have finally seen it in print.  We thank all our sponsors on this build.  It has truly been a dream fulfilled for me and the MSA Team to build a mini Semi-truck.


Read more

SEMA 2015: Project (Currently Unnamed)??

This 1971 Datsun 240z was handed down to me by a very close friend.  That said, I am giving him the honors of naming this build.

This 1971 240z will get a full on restomod build.  The build concept behind this is a combination of bringing back the old JDM fee with a pro touring look.  No show wires, engine covers, leather interior upgrades, etc...  One of the fun parts of the car is it still having it's original rear window louvers.

(Again, with sponsors, some are added or removed.  So henceforth, changes may be made.) Modifications will include a staggered wheel and tires set from Motegi and Nitto Tire.  Absent from the rendering will be addition of fender mirrors. The heart of the car will be the SR20DET blacktop from our drift car.  This motor was modified with a Disco Potato turbo, 300zx MAF, upgraded injectors, and enthalpy tune...pushing an estimated 350hp.  (For more info on our drift car, click here.)

UPDATE 06.01.15: The plans for the above remain the same.  However, the timing isn't good for this project, and therefore it is put on hold.  Be sure to watch for the resurrection.
Read more

SEMA 2015...The Projects start

SEMA Show logo is the trademark/copyright of SEMA
SEMA 2014 is now a thing of a the past.  Soon magazines will start printing their features and photoshoots from the show.  As with many things, when one chapter closes, another begins.  Preparations for SEMA 2015 have begun.  MSA itself is undertaking several builds this year.  Each will have it's own featured blog page.  Stay tuned...
Read more

MSA's 2014 SEMA Project: Sarge


Thanks to our awesome sponsors on this project.  Here's the skinny.

Project Sarge is owned by a local Veteran.  Having served 2 tours in Iraq, he was medically discharged when diagnosed with cancer after encountering a chemical agent during his tours.  After beating cancer, he felt the need to get back into service and joined the local Sheriff's Department.  It's our pleasure to be doing to this build for him.

SPECS:
MSA rock sliders with sealed/waterproof storage compartment.
MSA Grab handles
MSA Mesh Grille
LED Light bars
Aries front and rear bumpers
Custom Rear Tire Carries
Bright silver paint, scratched and semi-gloss cleared to simulate brushed aluminum
Riveting to simulate metal panels
Rugged Ridge Hurricane Fender Flares
Rugged Ridge Vented Hood
Rugged Ridge Short Snorkel
Teraflex 6" Long Arm suspension kit
RIPP Supercharger kit.
Magnaflow exhaust system


- Bryan Lin | CEO, The Motorsports Authority, Inc. | www.MSAStore.com

Read more

MSA's 2014 SEMA Project: After Dark


The rendering is complete.  Construction is under way.  I will begin to post images and blogs of this wonderful build.  The vehicle's owner is a long time fan of C10s.  But he wanted this build to be unique and very much custom.  Reliable, but something no one else has ever done before.  Here in lies the results of the discussion.

SPECS:

2001 Chevrolet Silverado
1967 Chevrolet Front cap, door skin, bed side skin, tailgate skin
Chopped top
Suicide doors
Airbag supsension
Shaved Tailgate
Smoothed front bumper
Colors: Black withe Graphite accents
LED light bars behind the grille


- Bryan Lin | CEO, The Motorsports Authority, Inc. | www.MSAStore.com
Read more

MSA's 2013 SEMA Project: Black Rhino > Snow Pictures

It's not every year that snow comes down in Arkansas.  So we definitely wanted to take advantage of the opportunity.  Here are the shots we got.  Feel free to use as a wallpaper.  In fact, we'd be honored.


Read more

MSA's 2013 SEMA Project: Black Rhino > What's SEMA without hurdles?

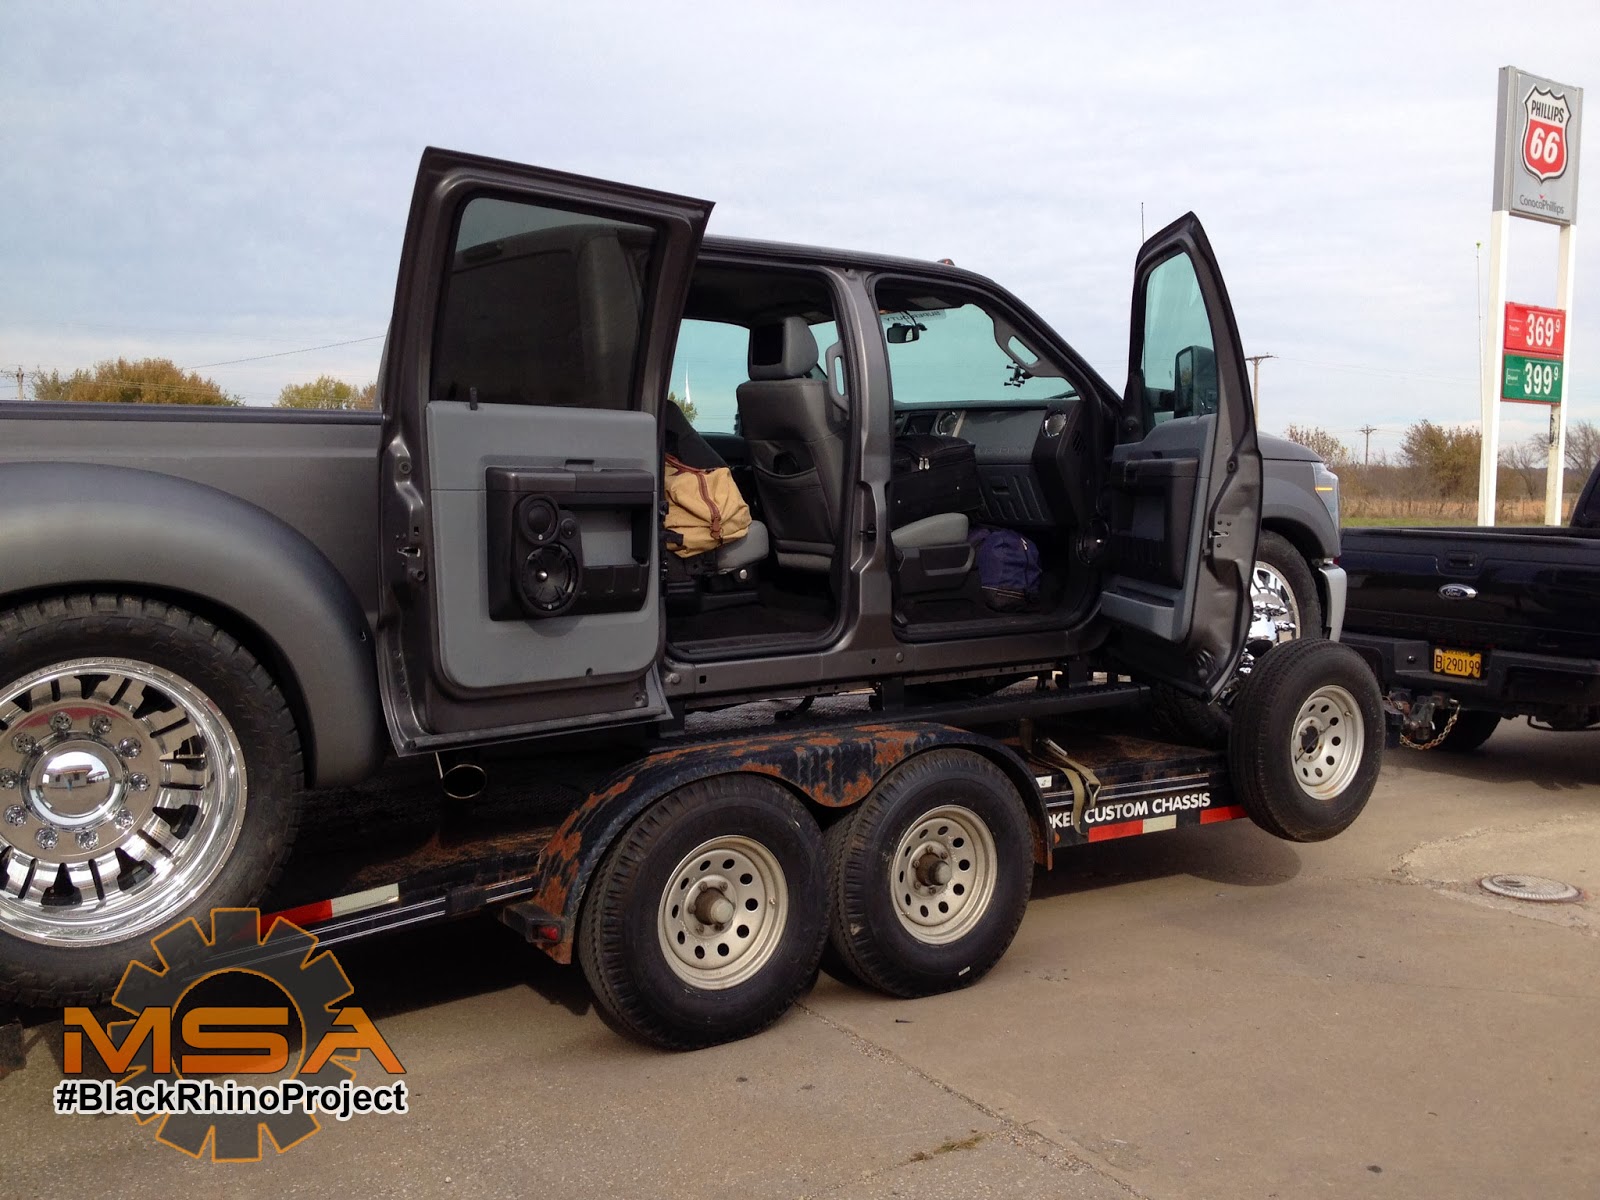
T'was the last day of the build before departure.  Late nights assembling last minute parts, the front end, the BedRug, BedSlide, Retrax Bed Cover, Automatic Cargo Lights, and the interior.  After it was all assembled, we took it for a test run.  It was a rocky drive and was deemed undriveable for the 22 hours drive it was to make in a few short hours.  We then scrambled to located a truck and a trailer with the capacities to pull Black Rhino.  The problem was, we would find a 5th wheel trailer and no truck with a hook up.  Or vice versa.  After a few hours, we finally located a bumper pull that would haul the load.

Or so we thought...  After finally getting on the freeway, the trailer began to sway some.  Due to the weight, the drive was no more than 60-65mph down the freeway.  Long nights and a 2 man crew taking shifts, the trailer blew a tire approximately 2 hours from Las Vegas.  Stressed and exhausted, they changed the tire on the trailer and continued.  30 minutes later, a second trailer tire blew.  Already late to the destination, the Black Rhino was pulled off the trailer and drove the rest of the way.

Black Rhino finally made it to the SEMA show approximately 5pm, Monday before the show.  By then, our booth spot was locked up and there were no entries into the location.  So we were then set aside in a new lot where many of the other "late" trucks were parked.  Seems like we weren't the only to have issues. There was another vehicle that was to be in the same booth that had suspension problems.  Broke down on the side of the road, they rented a local shop's bay for $2,000 that night!

The rush to SEMA and fulfilling sponsorship obligations is normally a stressful time for shops.  Unless you're just bolting on parts, you're looking at newly developed parts that are being tested.  You're looking at shops balancing clients and their SEMA build.  So many factors play into building a vehicle.  The final results are always incredible though, and it is always a memorable experience.  Thanks to everyone that's been following the Black Rhino Project.  Look for it's feature in Street Trucks magazine and Diesel Army Magazine.


Read more

MSA's 2013 SEMA Project: Black Rhino > Headlamp Retrofit


As with most everything, this wasn't an easy task to accomplish.  Most headlamps these days are situated in such a way that disassembling them makes it difficult.  There are several ways to go about separating the headlamp lenses, every single one of them softens the glue.  One way is the oven.  This is risky because the lenses are plastic and can melt under the heat.  Second is using a heat gun.  The challenge here is the black housing itself can melt under the heat gun should you keep it in one spot too long.  The last way I've been told is putting the headlamp in some very very hot water.

My option was the heat gun.  I didn't have a stove here at the shop to boil hot water and using our micro microwave wasn't an option.  The oven was too small.  In order to do this, I had to cut the outer lip of the black housing to access the glue to soften it.  Imagine the headlamp housing (black part) in the shape of a U.  Put your adhesive in the valley, then place the lens in it.  It's the most effective way of making sure you have a proper seal.  However, separating this is not an easy task.  Until I learn a better technique, I've had to cut the "U" into an "L", exposing the glue, then softening it from there.  I then use plastic pry tools and as the glue softens, work myself into separating the lenses.  (I'm sorry I didn't take better pictures of this process.)

Once the lens was separated, the inside housing was removed for trimming.  Per the instructions from the retrofit source, the housing is cut and JB Welded into place.  Due to time constraints, this is what I did.  However, it was my first option to create 4-way adjustments.

Another trick we did on this setup was, we relocated the hi/low beam to the top section and the turn signals to the bottom.  It was a subtle hint that most may not have caught.  I dremeled the lower housing to allow the turn signal to fit in there as if it were factory.

The reflector was separated and paint matched as well, leaving a small strip for DOT legal purposes.  The law states that the front must have an orange reflector.  The retrofit source's xB light strip in amber replaced our existing 194 bulb for a brighter light and a cooler effect.

This was my first retro fit installation, so of course, there were some hiccups.  The instructions require the truck to be at level height to do the installation.  Unfortunately, I didn't have that due to the suspension being modified.  All in all, it was a good learning experience for me.  I'd say I would definitely continue to do this type of work just to gain the experience.

Again, I apologize for the lack of images.  As the deadline grew closer, the focus was on getting the truck done.  In addition, the reflections in the images, made it difficult to capture the true look of the headlamps.

Read more

MSA's 2013 SEMA Project: Black Rhino > Front Bumper, Rear Bumper, and Other things you might not catch.

There are a few subtle changes on this vehicle that people don't notice.  I thought they deserved some pointing out.

FRONT BUMPER
If you notice the original rendering, the front bumper is WAY lower than OE.  It was designed that way.  The theme of the truck is a mini-semi truck.  In order to do so, we had to have a larger front bumper/air dam.  To do this we had to succeed in doing 2 things - keeping the factory lines and lowering it approximately 4 inches.  With our time constraints, our best option was to purchase another front bumper, weld, and mold it in.  When completely deflated, the front bumper with air dam sits about an inch off the ground.  Perfection.


REAR DUALLY FENDERS
As described in a previous blog, the rear fenders were rendered to be flush with the wheels.  But this was also our tow vehicle that would haul a 24' enclosed trailer with a drift car and tools.  So, we wanted 10ply tires to ensure the truck could handle the load.  Nitto, our sponsor, had 1 tire that would fit the bill - The Terra Grappler at LT315/50R24, which equates to a 36.54" total diameter and approximately 12.5" in width.  Most people walked by not realizing the massive width of the fender, but it came out to be about a 4 day job to make sure both sides not only matched, but the lines were right.

SUICIDE DOORS
Most people didn't play with these, and of course, we aren't complaining.  At shows, vehicles really aren't meant for the general public to just play and handle as they wish.  But, when one of us were present, we definitely want to show the 3 weeks of love put into this.  The doors open and close just like factory from the inside or the outside.  The gaps between the doors and the body are right.  The added metal reinforcement prevents them from sagging.

BAG SETUP
The rear setup is heavily reinforced.  We used 1/4" and 1/2" steel because we knew that there was a possibility of a gooseneck setup in the future.  So we set it up that way, and with our 3800lb bags, we should be able to haul just about anything.  The parallel bars and other items on the truck assists in that setup, keeping the rear more rigid than it was from the factory.

SWITCHES and RUNNING BOARDS
The switches and the running boards weren't offered for my truck's specific model.  They could have been upgraded, but weren't purchased that way.  The running boards are from a Lariat which were disassembled and painted.  This truck is an XLT model.  It also had the AUX OE Switch option that we purchased separately.  These run the Grille lights, additional fog lamps, and the rear bumper lights.

FENDERS
We actually molded the front fenders.  We wanted a more smooth look, and the front fenders seem out of place with the line in it.  Since we did that, we had to modify the Bushwacker Extend-A-Fenders up front to account for the body line elimination.

PAINT
It was a common misconception that we wrapped the truck.  There are several companies that had the brushed steel look in a wrap, so at a quick glance, a lot of people made that assumption.  But no.  We didn't want the truck to be merely wrapped.  That showed no technical skill.  We had to take it a step further and we actually "scratched" the truck to give it the brushed look.  We accomplished this with 180 grit sandpaper, and red and gray scotchbrite pads.  Total process took about 8 hours.


Read more